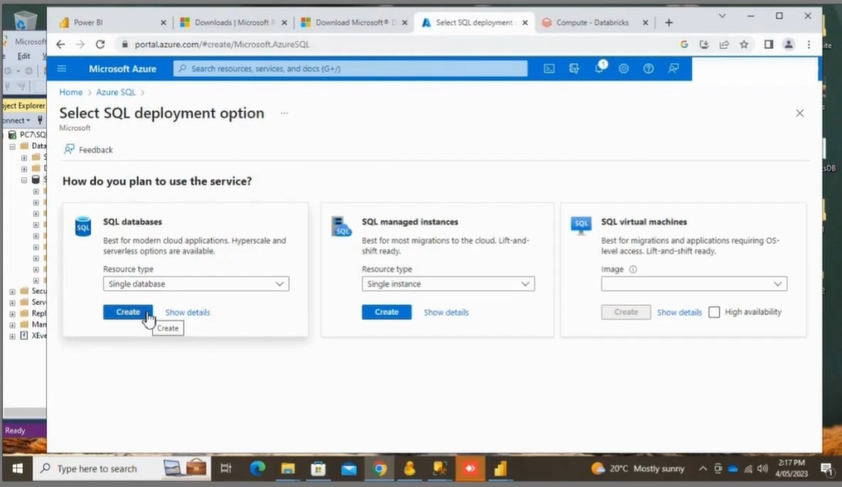
- Step: 1. Open the Azure portal and search for “Azure SQL” in the search bar.
- Step: 2. Navigate to the Azure SQL website and select the option to create a new database.

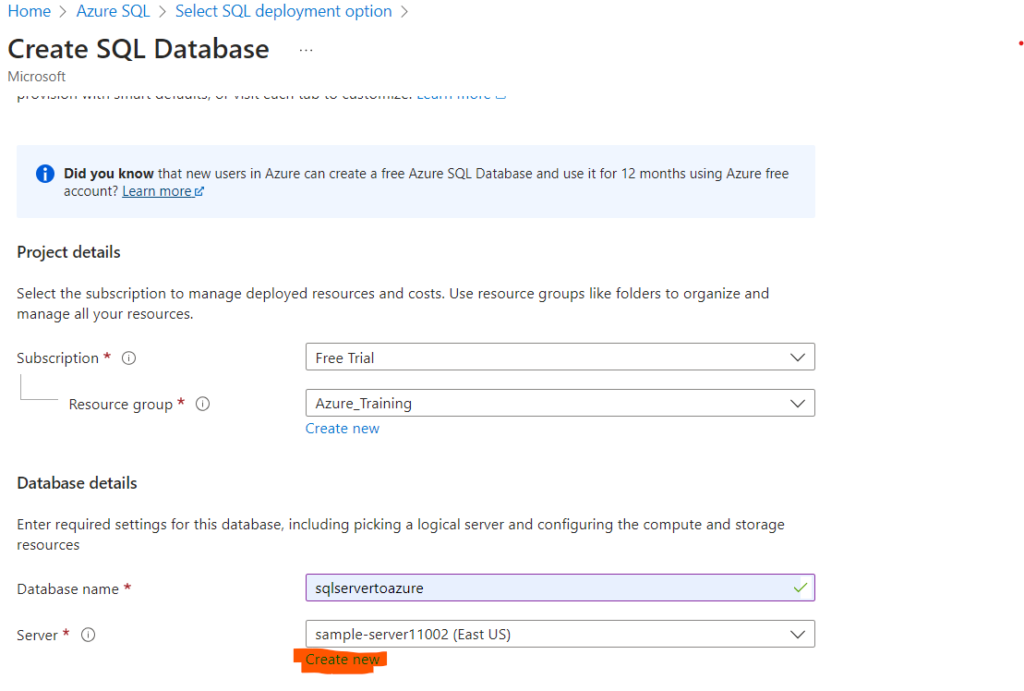
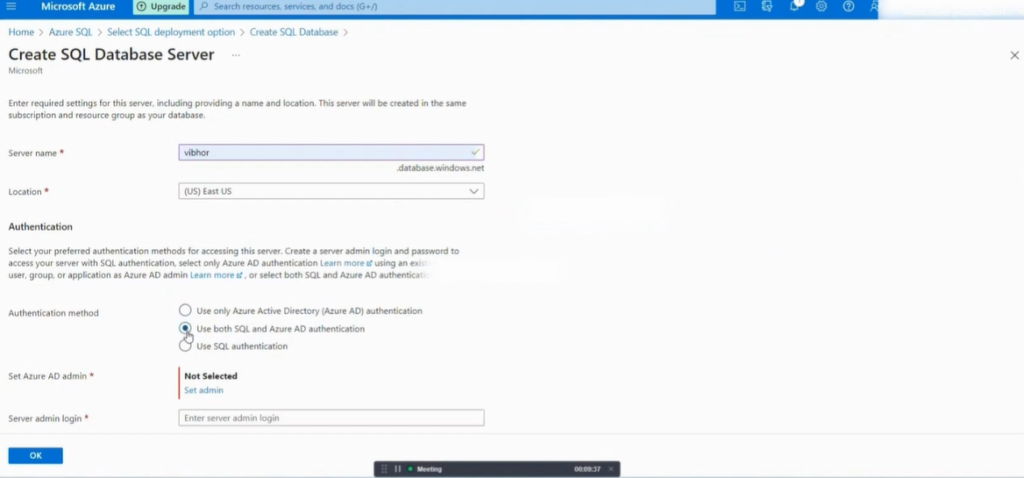
- Step: 3. Fill in the required information, choose both SQL Server and Azure AD authentication, and then click on the create button.
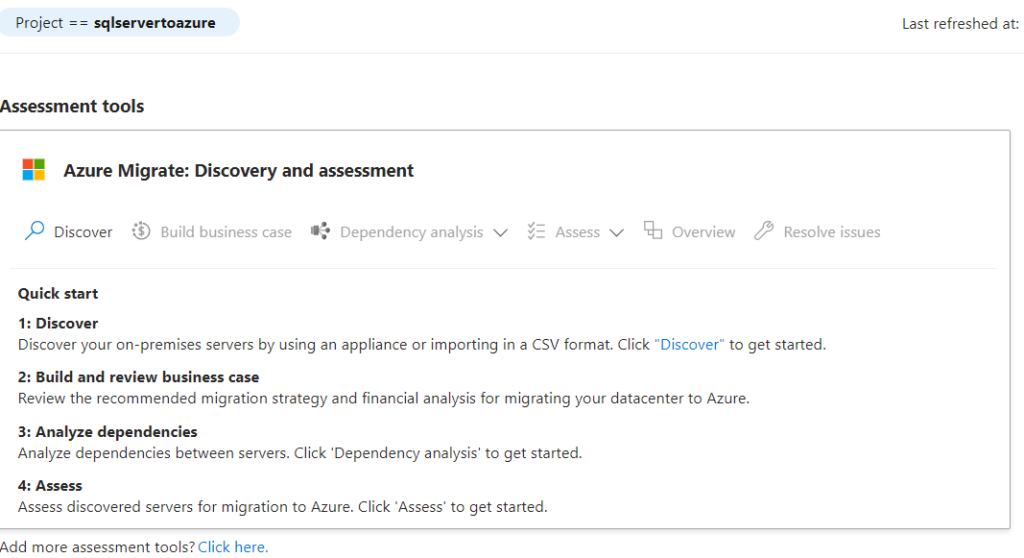
- Step: 4. In the Azure portal, use the search tab to find and select “Azure Migrate.”

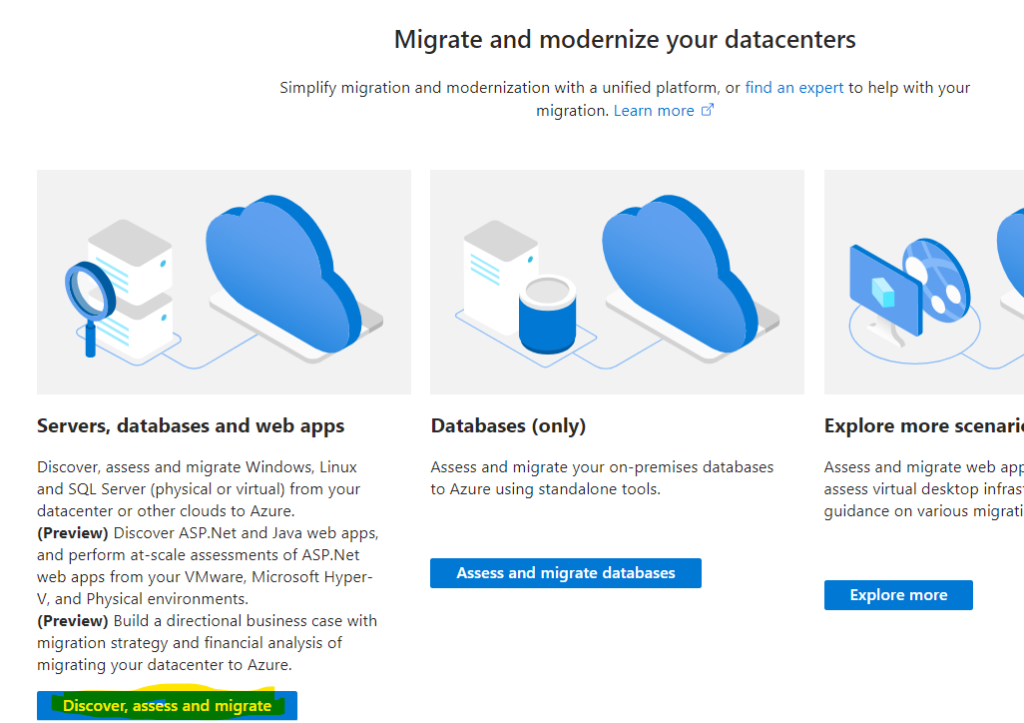
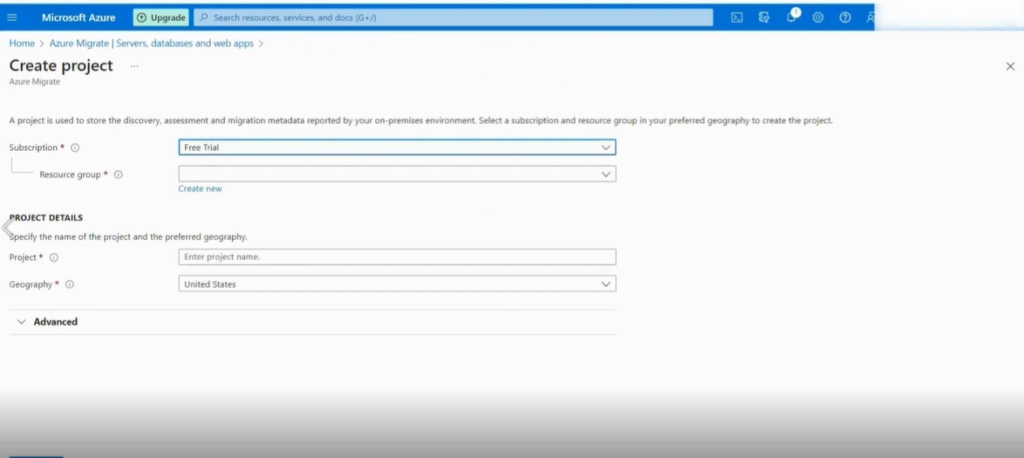
- Step: 5. Within Azure Migrate, choose the Servers, Database and Web apps option and click on the Create button.
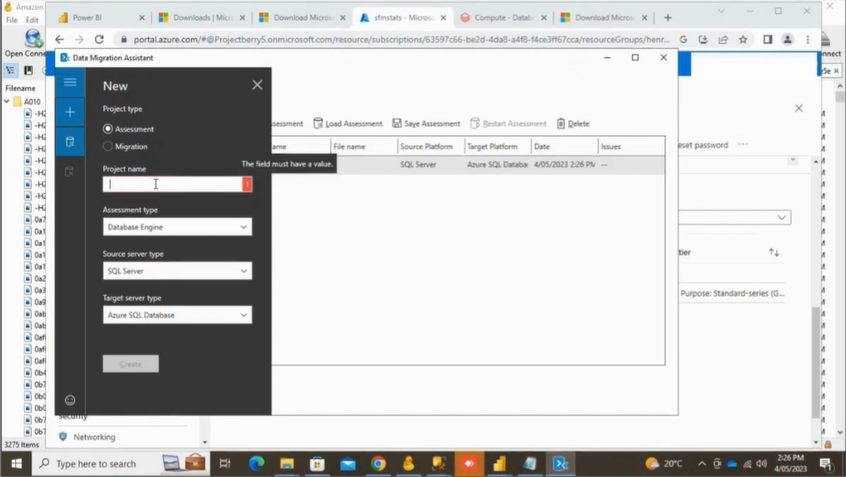
- Step: 6. Download the Data Migration Assistant tool.
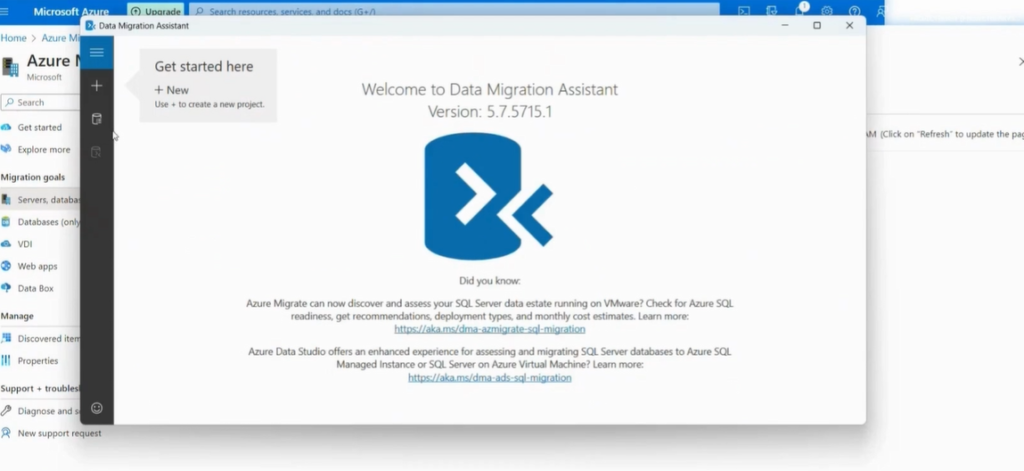
- Step: 7. Open the Azure Data Migration Assistant tool and select the assessment feature.
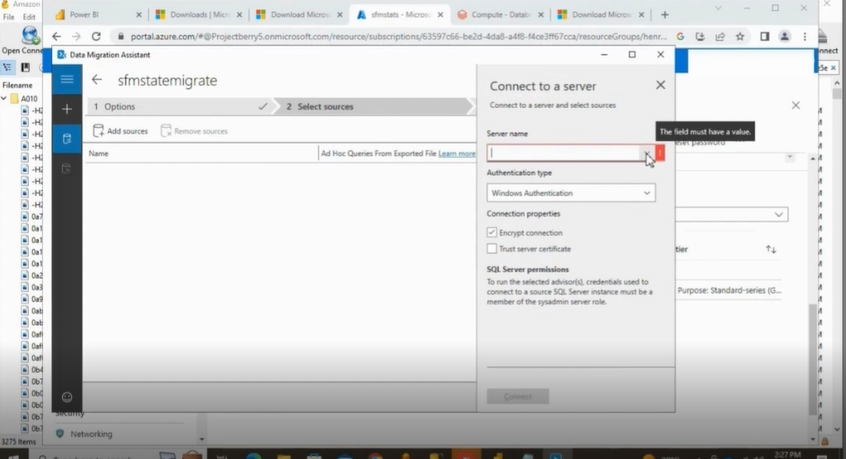
- Step: 8. Connect to the server by providing the source credentials and click on connect.
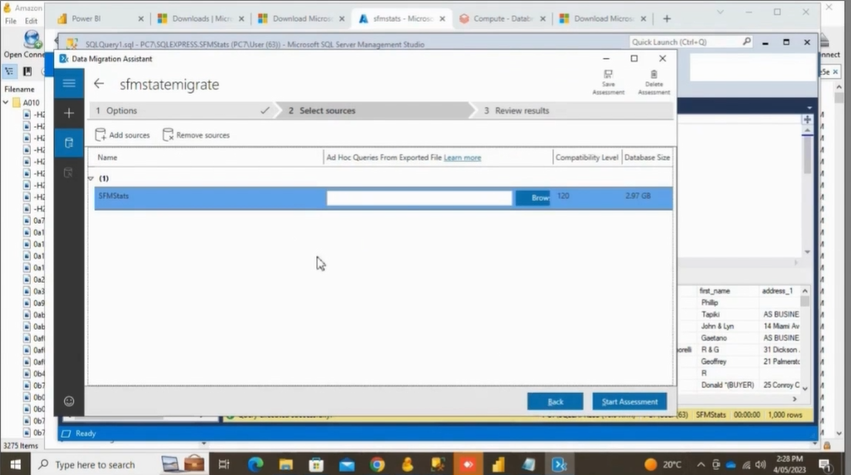
- Step: 9. Start the migration process by clicking on the start migration button.
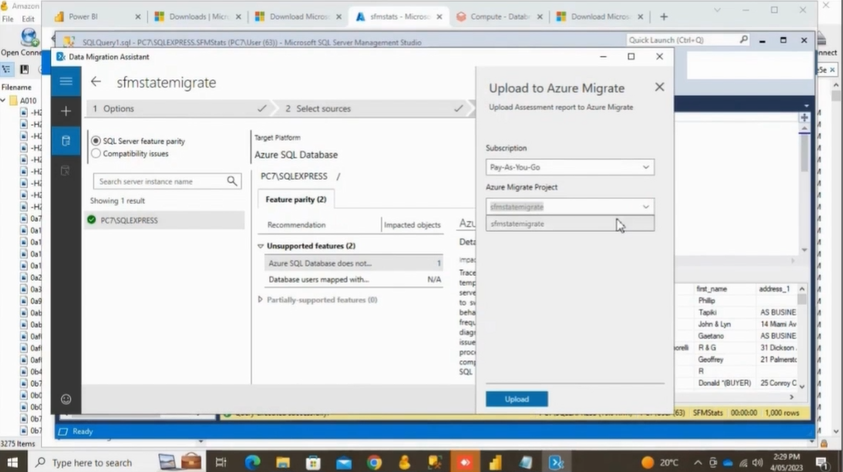
- Step: 10. Upload the migration data to Azure Migrate.
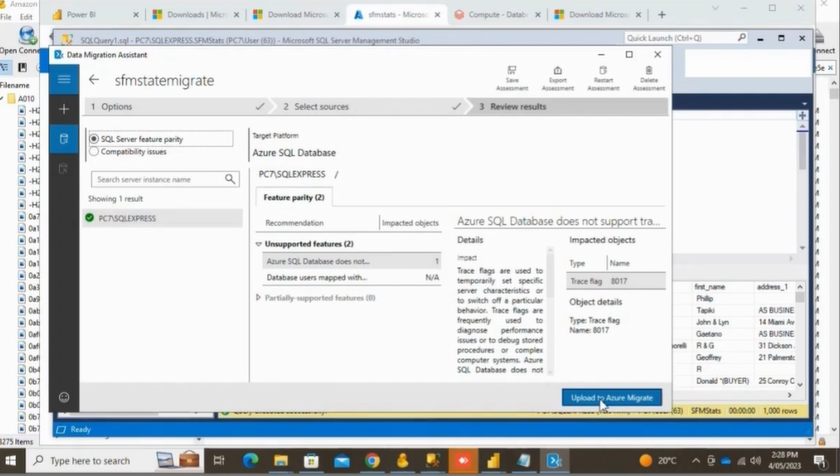
- Step: 11. Upload the data to Azure Migrate by clicking on the upload button.
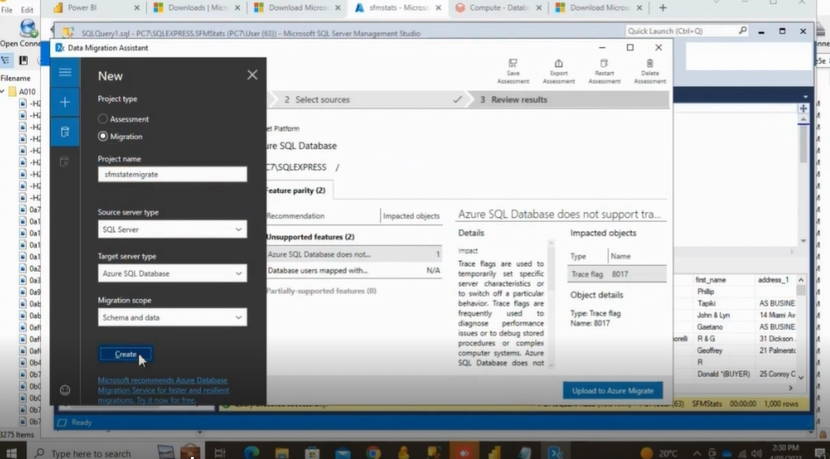
- Step: 12. Click on the migration button and then click on the create button.
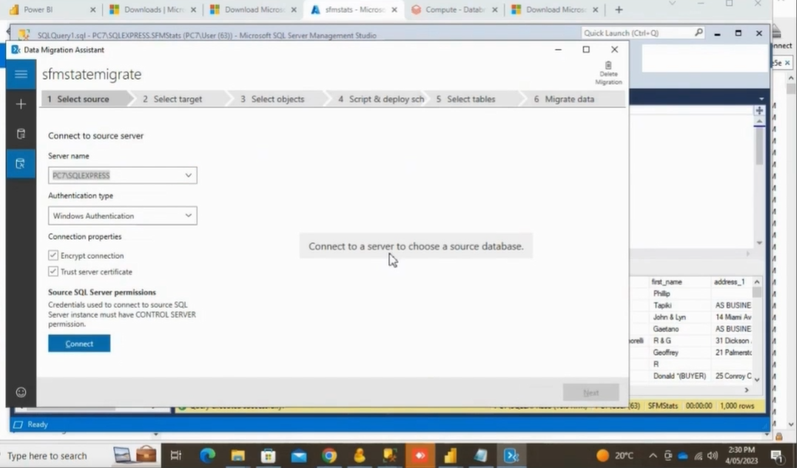
- Step: 13. Provide the source credentials again and click on connect.
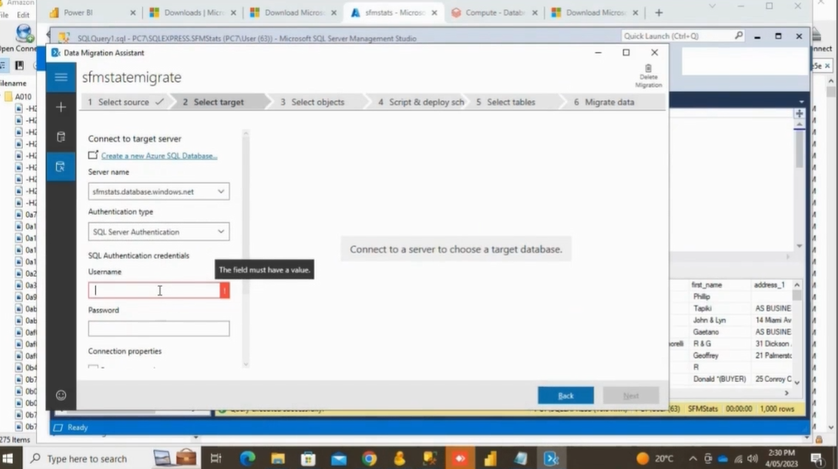
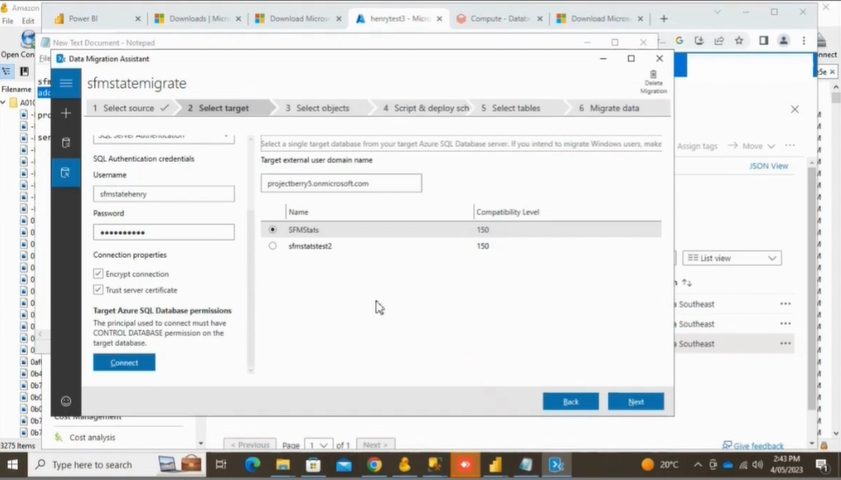
- Step: 14. Enter the credentials for the target database and click on connect.
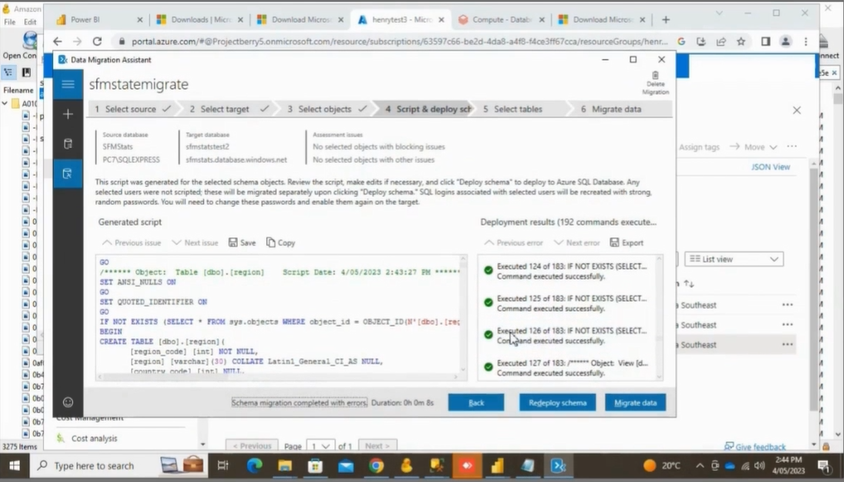
- Step: 15. : After entering the target credentials, go to the select objects section and generate an SQL script.
- Step: 16. Proceed to the Script & Deploy Schema section and click on the migrate button.
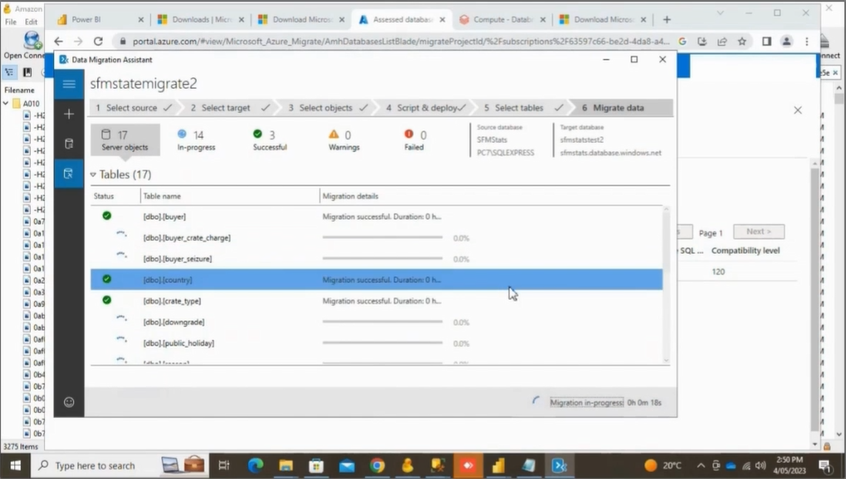
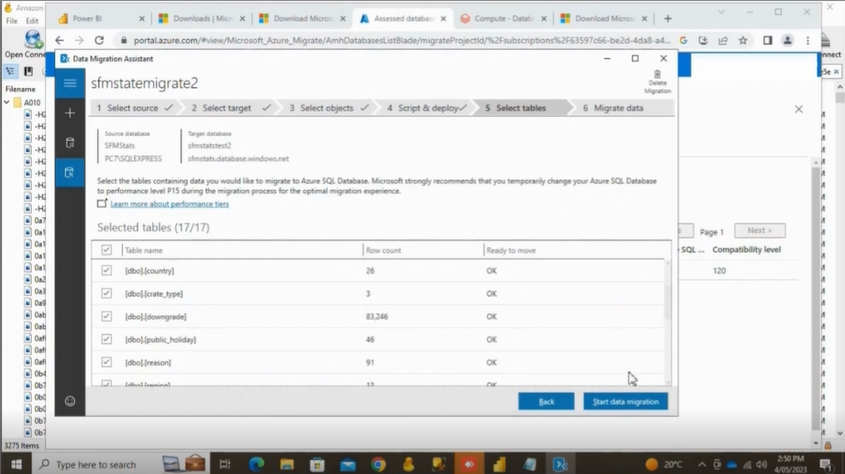
- Step: 17. Once in the migrate data section, select the tables you want to migrate and click on the start data migration button.
- Step: 18. Monitor the data migration process, and you will see the migration progress successfully.